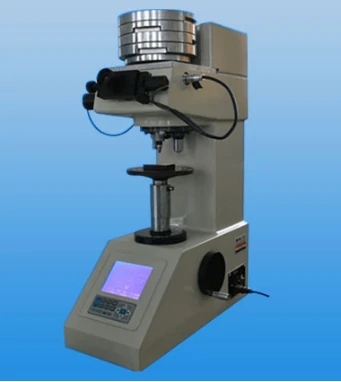
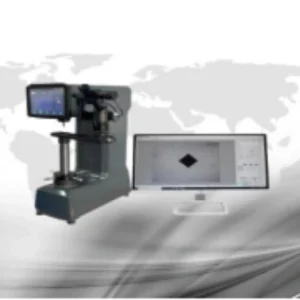
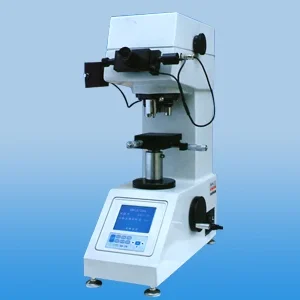
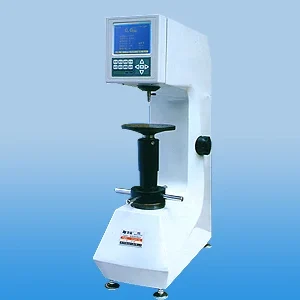
200HVS-10 digital small load Vickers hardness tester
Product Technical Specifications Overview
This document outlines the main technical specifications of a precision hardness testing instrument. This instrument utilizes the Vickers hardness test method and is designed for accurate and reliable measurements across a wide range of materials and applications.
1. Experimental Forces (Seven Levels):
This instrument offers seven selectable experimental forces, allowing for testing a variety of materials with different hardness ranges. The forces are specified in both Newtons (N) and kilogram-force (kgf):
-
4.903 N (0.5 kgf): Suitable for very soft materials and thin samples.
-
9.807 N (1.0 kgf): Commonly used for softer metals and plastics.
-
19.61 N (2.0 kgf): A versatile force for general-purpose hardness testing.
-
24.52 N (2.5 kgf): Provides a slightly higher force for medium-hardness materials.
-
29.42 N (3.0 kgf): Another versatile force for medium-hardness materials.
-
49.03 N (5.0 kgf): Suitable for harder metals and ceramics.
-
98.07 N (10 kgf): Used for testing hard materials and components.
Note: The use of “kgf” represents kilogram-force, which is the gravitational force on a mass of one kilogram. While not an SI unit, it’s a common term in hardness testing.
2. Measuring Range:
The instrument’s measuring range is from 5 to 3000 HV (Vickers Hardness). This wide range allows for accurate testing of a diverse selection of materials, from very soft to very hard.
3. Optical System:
The optical system is crucial for accurately measuring the indentation created by the indenter. It consists of:
-
Objective Lenses:
-
10X: Provides a 10x magnification of the sample for initial viewing and indentation location.
-
40X: Provides a 40x magnification for precise measurement of the indentation.
-
-
Eyepiece:
-
12.5X: Provides a 12.5x magnification of the image, combining with the objective lenses for total magnification.
-
-
Total Magnification Factors:
-
125X (10X Objective + 12.5X Eyepiece): Used for initial viewing, indentation location and general observation.
-
500X (40X Objective + 12.5X Eyepiece): Used for accurate measurement of the indentation.
-
-
Measuring Ranges (Field of View):
-
10X Objective: 1.0 mm (1000 micrometers) – Field of view when using the 10x objective lens.
-
40X Objective: 0.2 mm (200 micrometers) – Field of view when using the 40x objective lens.
-
4. Measurement Accuracy:
The instrument provides a measurement accuracy of ±0.01 μm (micrometers). This high accuracy is critical for obtaining reliable and precise hardness measurements.
5. Duration Time:
The indentation duration (dwell time) is adjustable from 0 to 99 seconds, allowing for precise control over the test process and customization based on material type.
6. Sample Accommodation:
-
Maximum Allowable Sample Height: 130 mm – This is the maximum height of the sample that can fit in the testing area.
-
Distance from Pressure Head to Machine Wall: 110 mm – This is the distance between the center of the indenter and the machine’s frame, providing a constraint on the sample size or the position where the indentation can be made.
7. Coordinate Test Bench Size:
The coordinate test bench (stage) measures 100 x 100 mm, providing a stable platform for sample placement.
8. Coordinate Test Bench Travel:
The coordinate test bench allows for sample movement in two axes with a travel range of 25 x 25 mm, enabling precise positioning of the sample under the indenter.
9. Coordinate Test Bench Division Value:
The test bench has a division value of 0.01 mm, allowing for precise positioning of the sample for multiple tests or measurements on specific regions.
10. Light Source:
The instrument is equipped with a 3.4V/1W light source, which provides ample illumination for clear observation and measurement of the indentation.
11. Language Options:
The instrument supports both Chinese and English language options for user interface and control.
12. Power Supply:
The instrument is designed to operate on a power supply of 220V, 50Hz (with an option for 110V/60Hz).
13. Whole Machine Power Consumption:
The maximum power consumption of the instrument is ≤50W, making it energy-efficient.
14. External Dimensions:
The instrument’s external dimensions are 486 x 337 x 657 mm (Length x Width x Height).
15. Weight:
The instrument weighs 88 kg, indicating its robust construction and stability.
Summary:
These specifications define a versatile and accurate Vickers hardness testing instrument. The instrument is designed for reliable measurements across a wide range of material types and offers a user-friendly operation with adjustable test forces, precise optical measurements, and automated functions. The sample accommodation, test bench movement, and user interface demonstrate the instrument’s flexibility for various test requirements.


